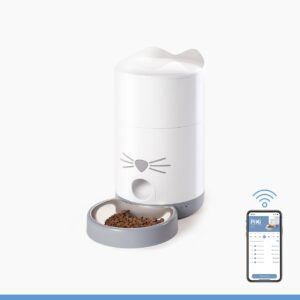
If you have a different question about your Catit PIXI Smart 6-meal Feeder, please see our Help and Advice page.
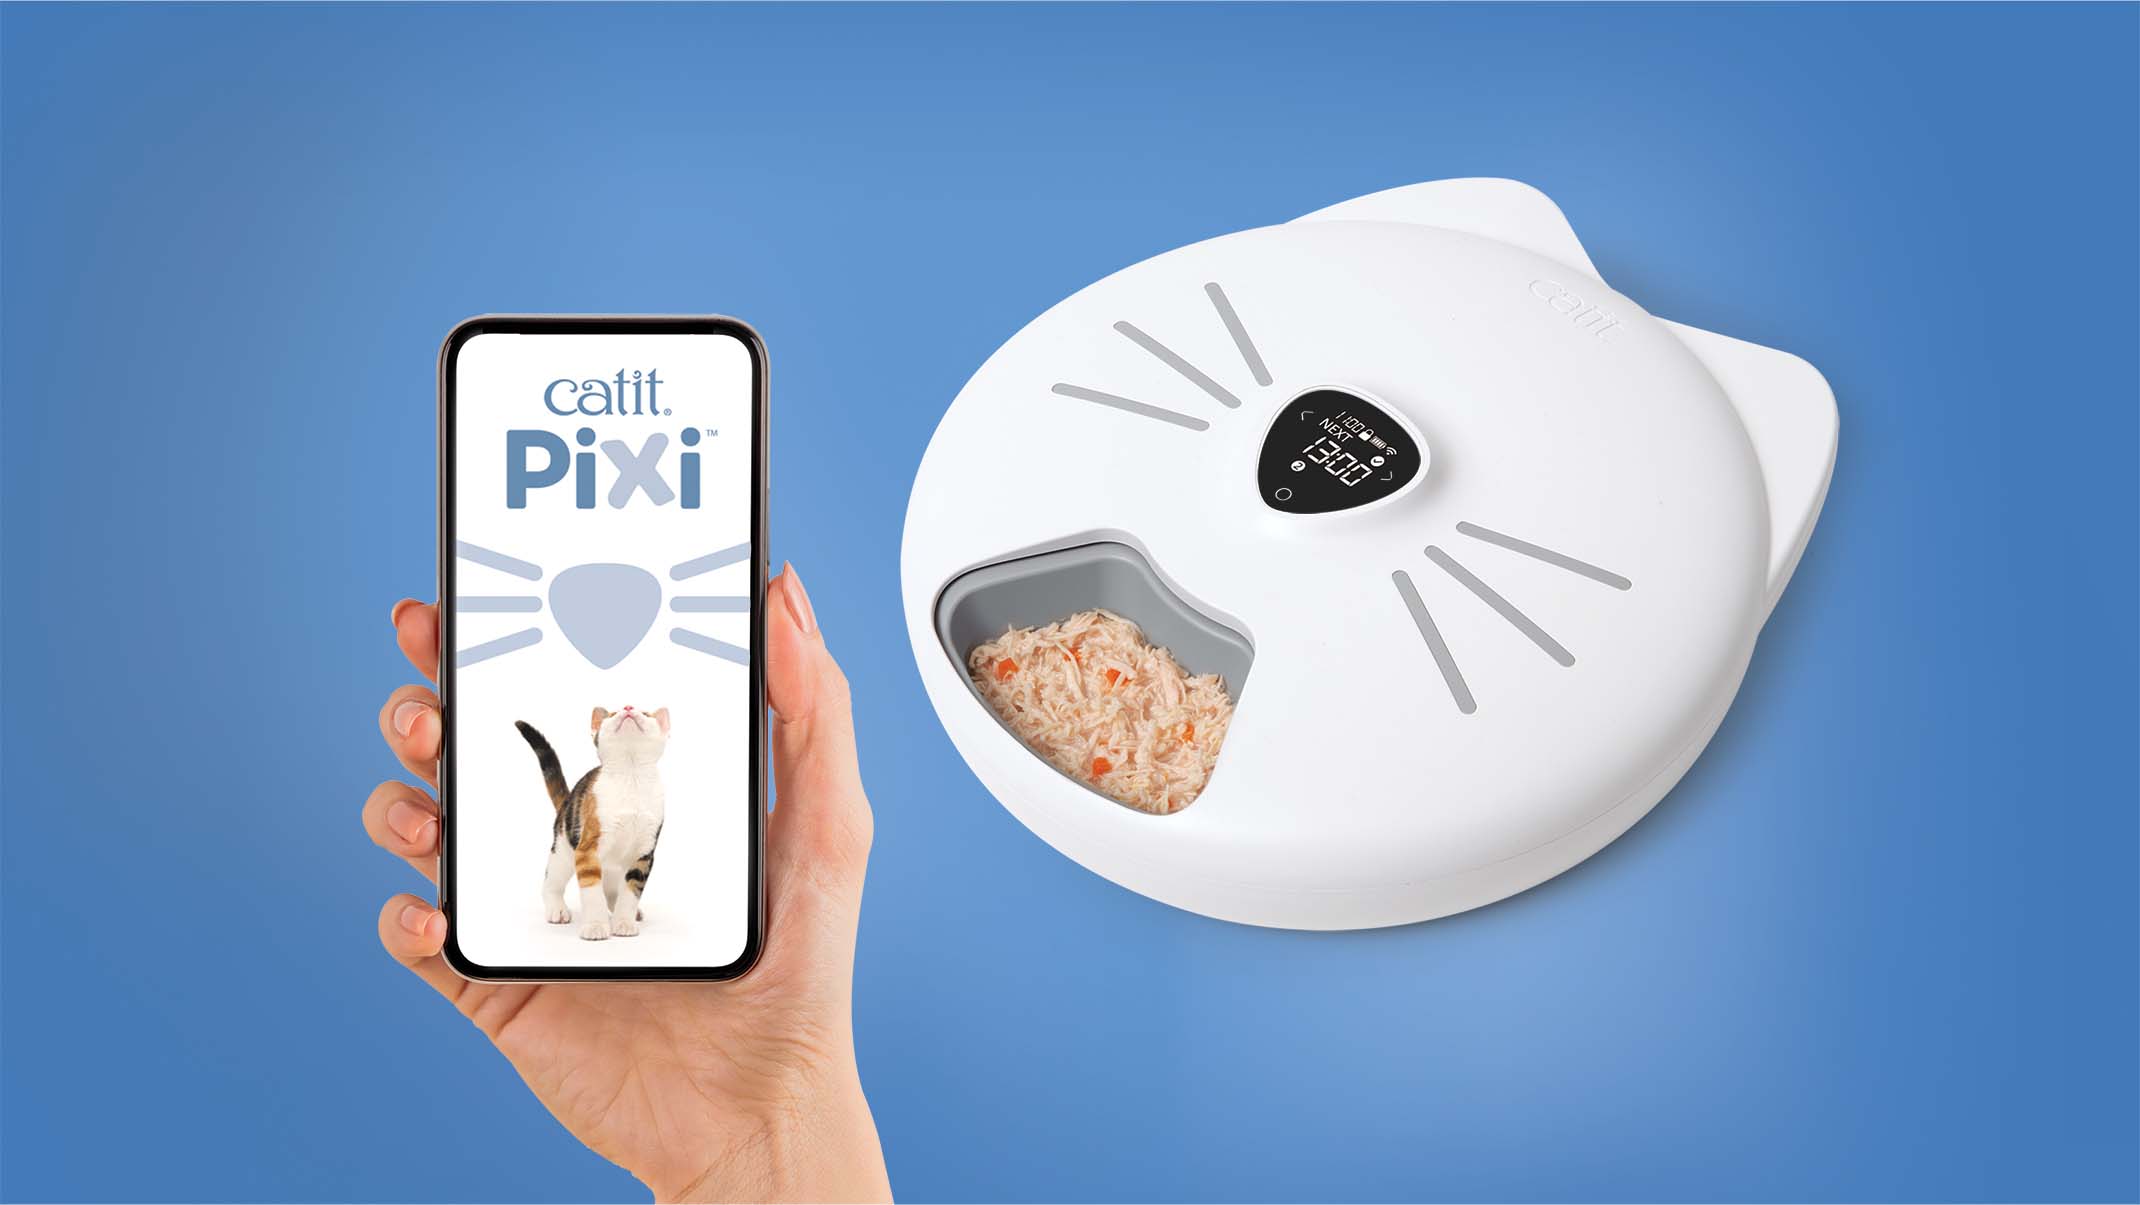
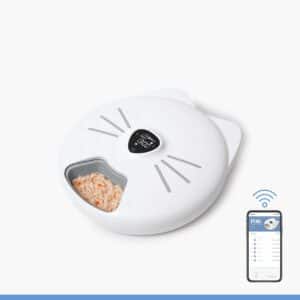
Before anything else, please set up your Catit PIXI Smart 6-meal Feeder and pair it to your Catit PIXI app using our Quick Start Guide.
Continue reading to learn about each of the app’s features, or use one of the quick-links below to jump ahead:
- 1. Set feeding schedule
- 2. Overview
- 3. Meal served
- 4. Adjust / delete meals
- 5. Serve next meal
- 6. Audio
1. Set your cat’s feeding schedule
Open the Catit PIXI app and select your PIXI Smart 6-meal Feeder. Note: if the feeder is not shown in your list of devices, you’ll first need to install it using our Quick Start Guide.
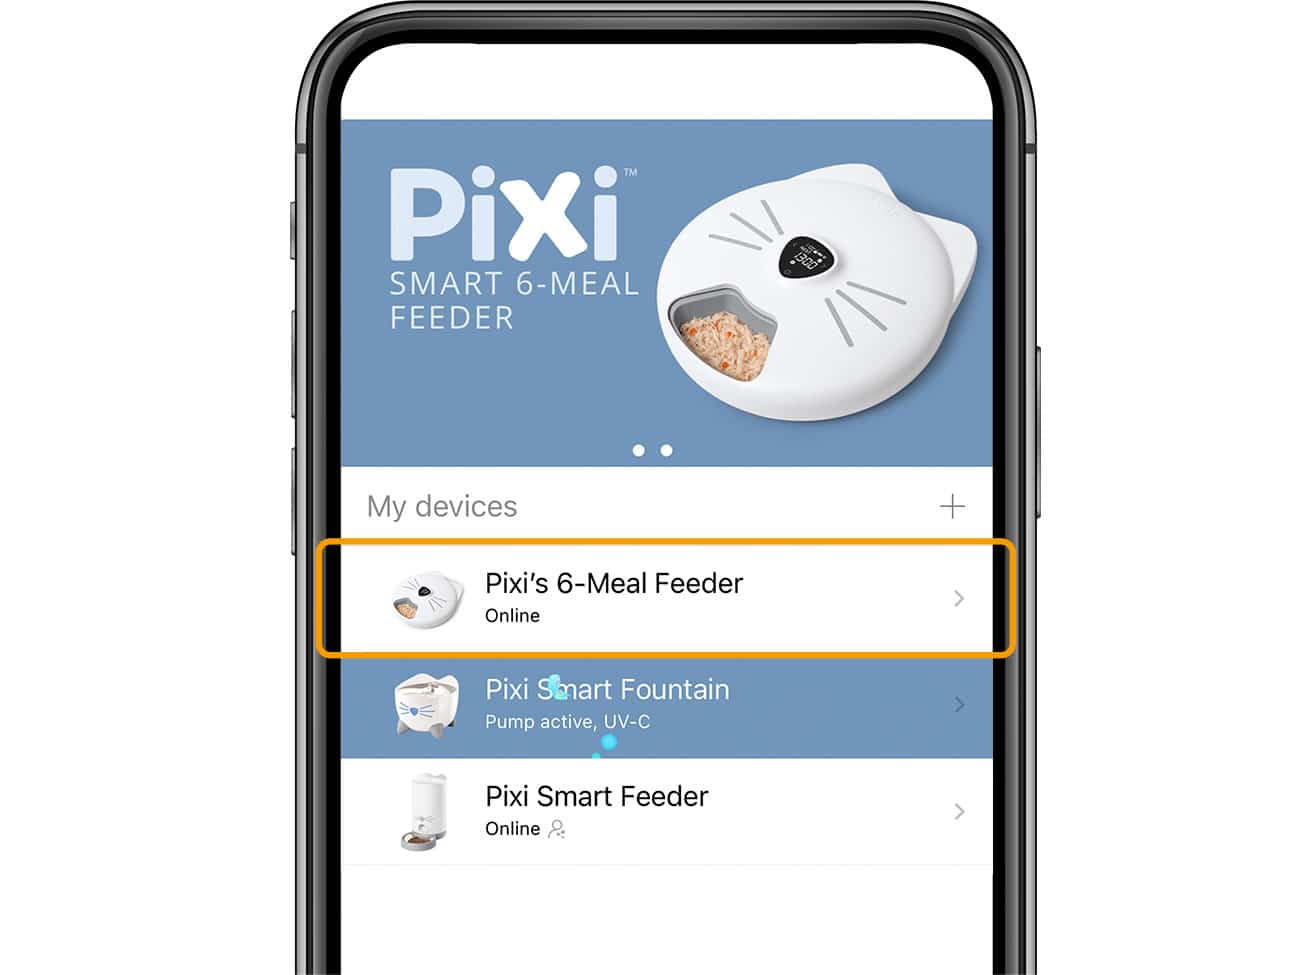
You can now see your feeder’s home screen. Meal 1 is already marked as served because the first compartment of the feeding tray is open by default and does not require scheduling.
To set up your cat’s feeding schedule tap ‘add meal +’. Select a serving time for Meal 2 and press ‘save’. If you are unsure which feeding tray compartment a certain meal number corresponds to, refer to the illustration at the top of the app screen. The matching tray compartment will be marked in grey.
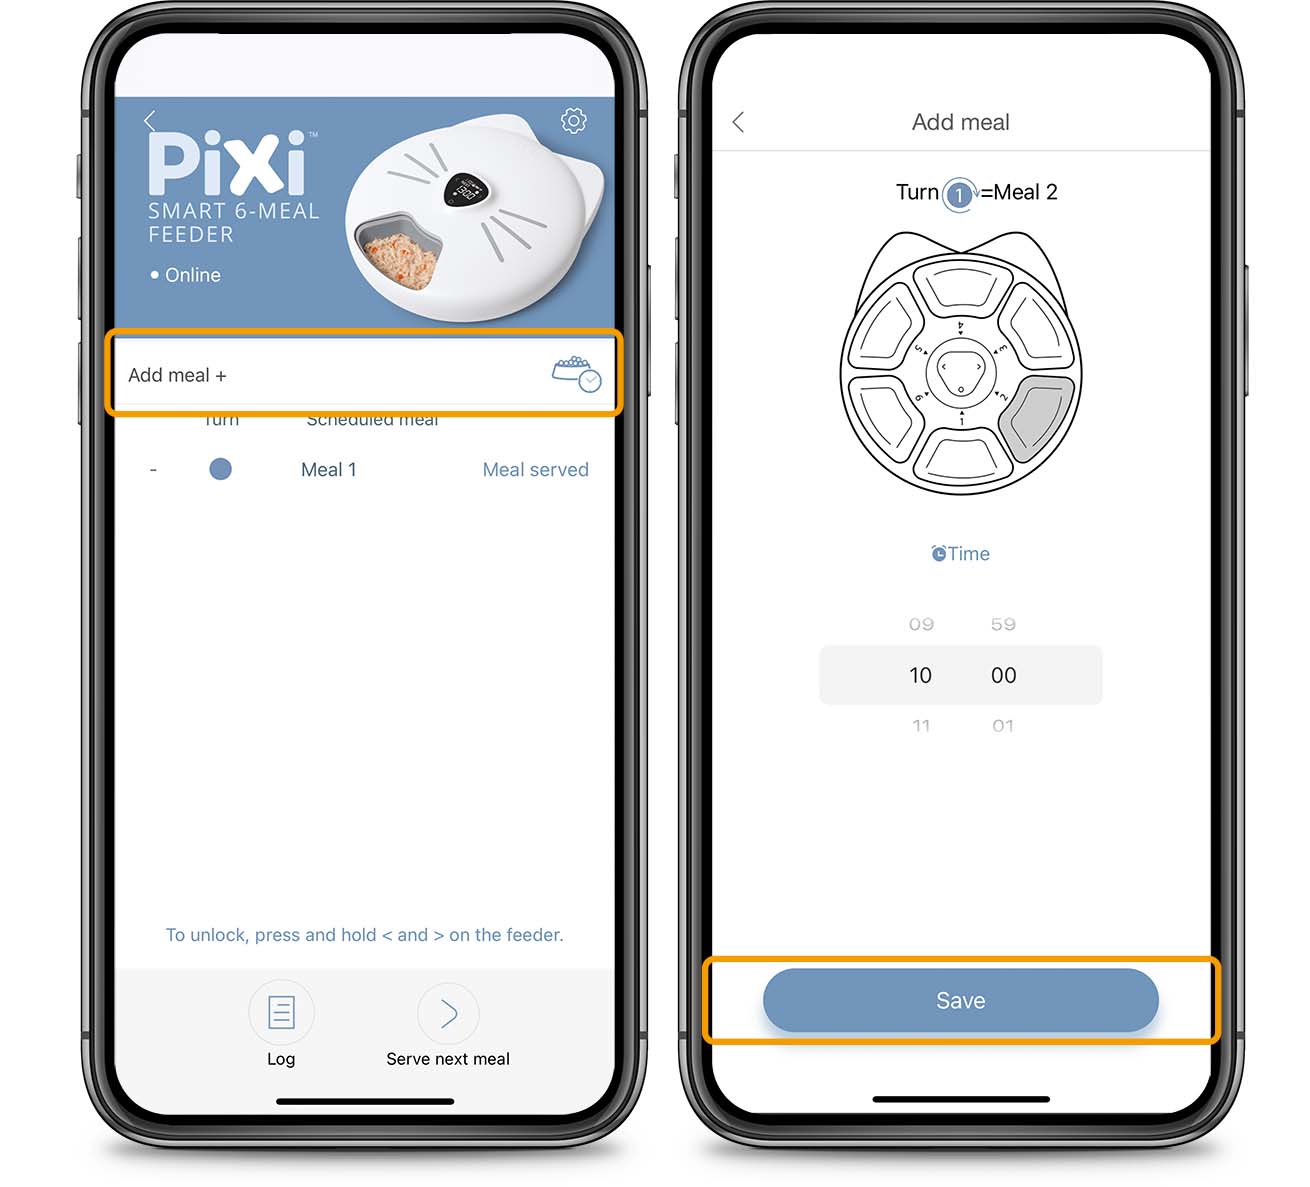
Repeat these steps until the feeding schedule is complete. You can add up to 6 meals.
2. Overview
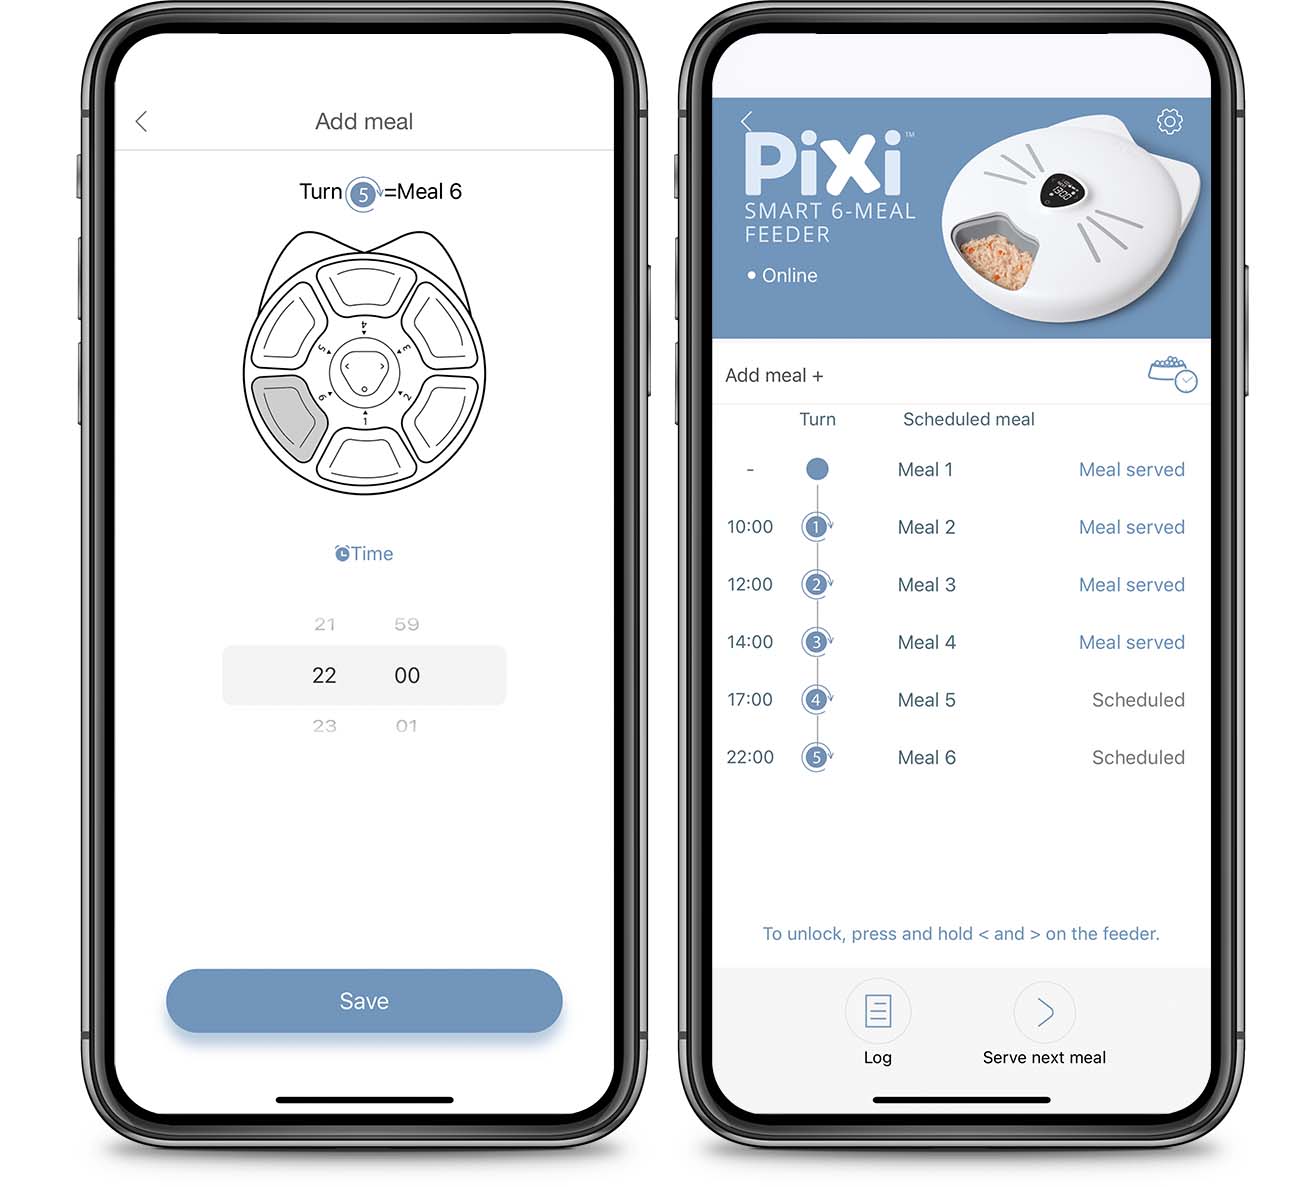
This app screen shows an overview of all scheduled meals in your feeding plan. The numbers in the blue circles indicate the turns of the feeding tray, which are also shown on the LCD display of your Catit PIXI Smart 6-meal Feeder. Meal 1 sits in the initial open feeding tray compartment and has no number of turns. Meal 2 is served on the first turn. Meal 3 is served on the second turn, and so on.
You can choose to have as many meals in your feeding plan as you like, with a maximum of 6 meals a day (corresponding to 5 turns of the feeding tray).
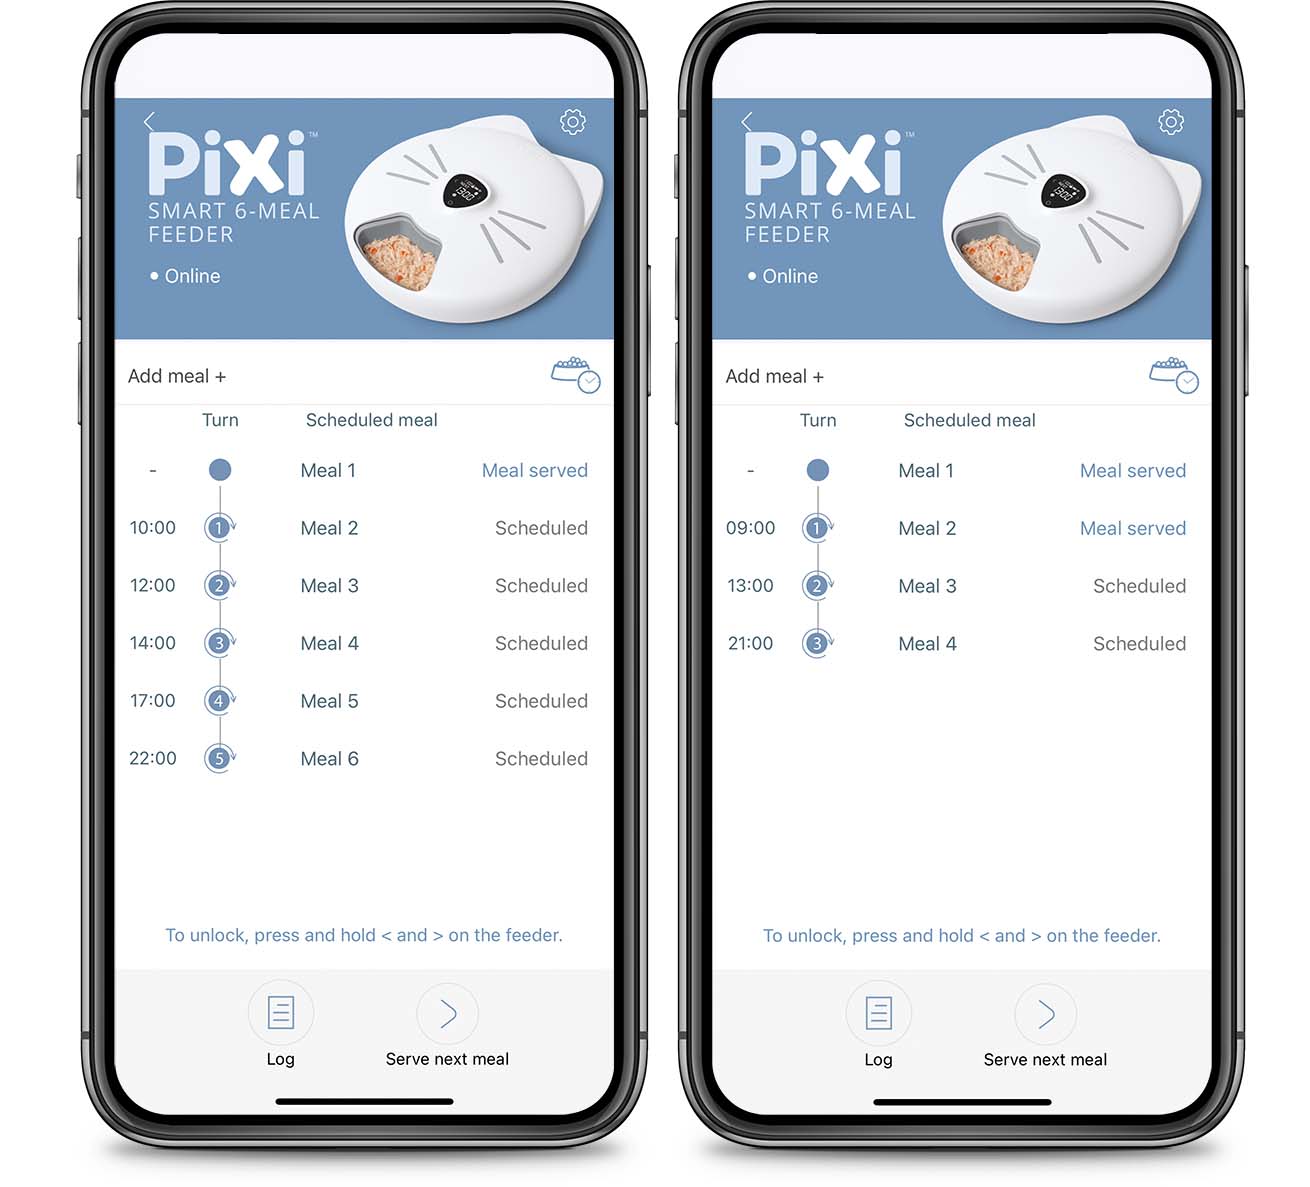
Examples of two different feeding plans, one with 6 meals (left) and another with just 4 meals a day (right).
3. ‘Meal served’ indication
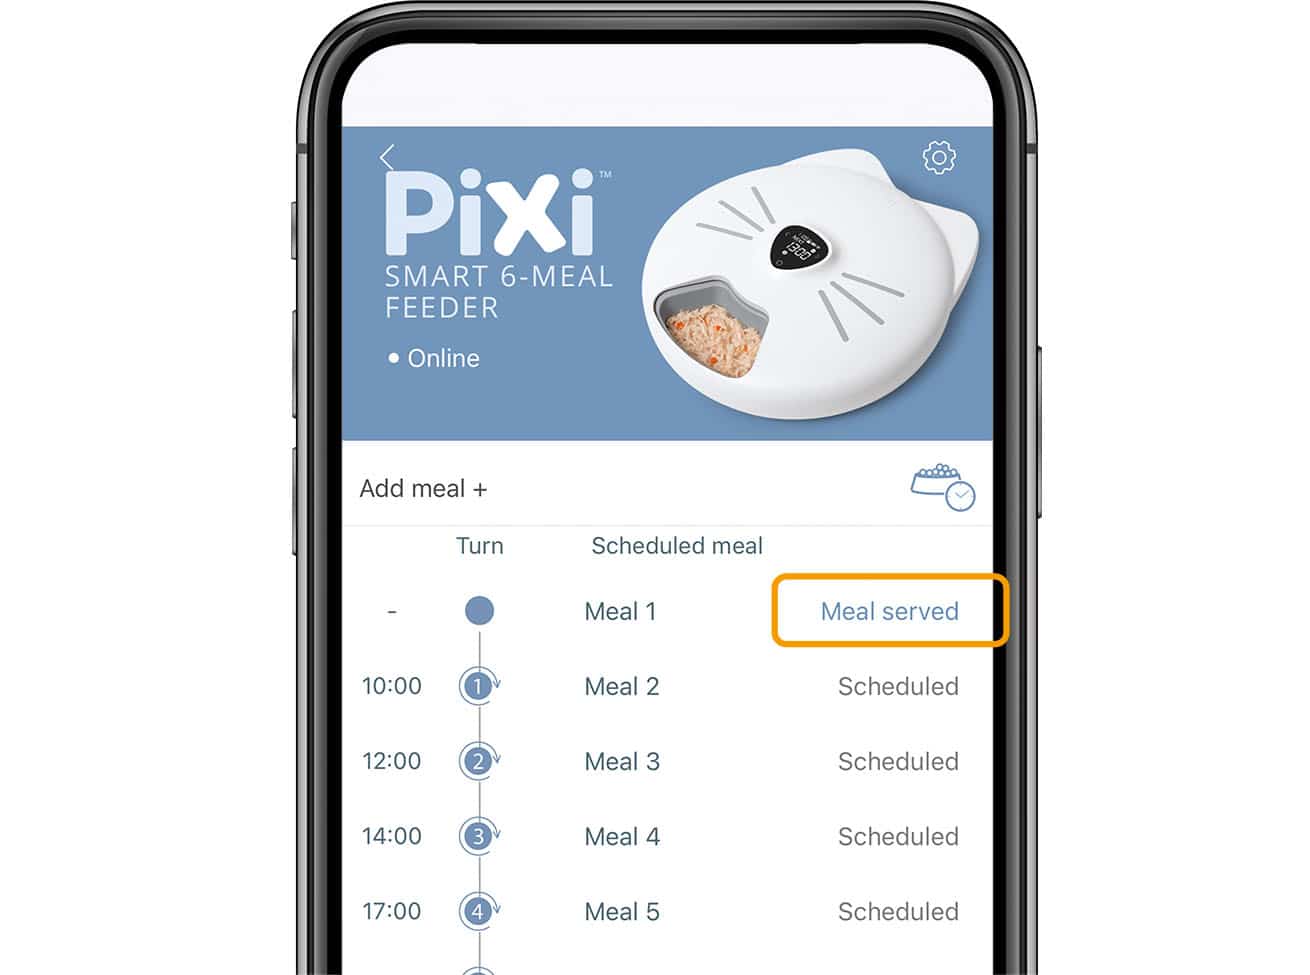
When the feeding tray has finished rotating to the next compartment, the meal in the open slot will be marked as ‘meal served‘ on your app screen. Please note that Meal 1 is always shown as ‘served’ since the first tray compartment is open by default.
4. Adjust and delete scheduled meals
You can choose to adjust and delete scheduled meals at any time. Meal 1 can’t be adjusted or deleted as it is instantly available by default, but you can choose to leave this tray compartment empty.
Note: The feeding tray will always rotate in the same direction, from compartment 1 to compartment 6. This means that, if you adjust or delete meals from your schedule, the feeding tray compartments will no longer correspond to the schedule you made originally.
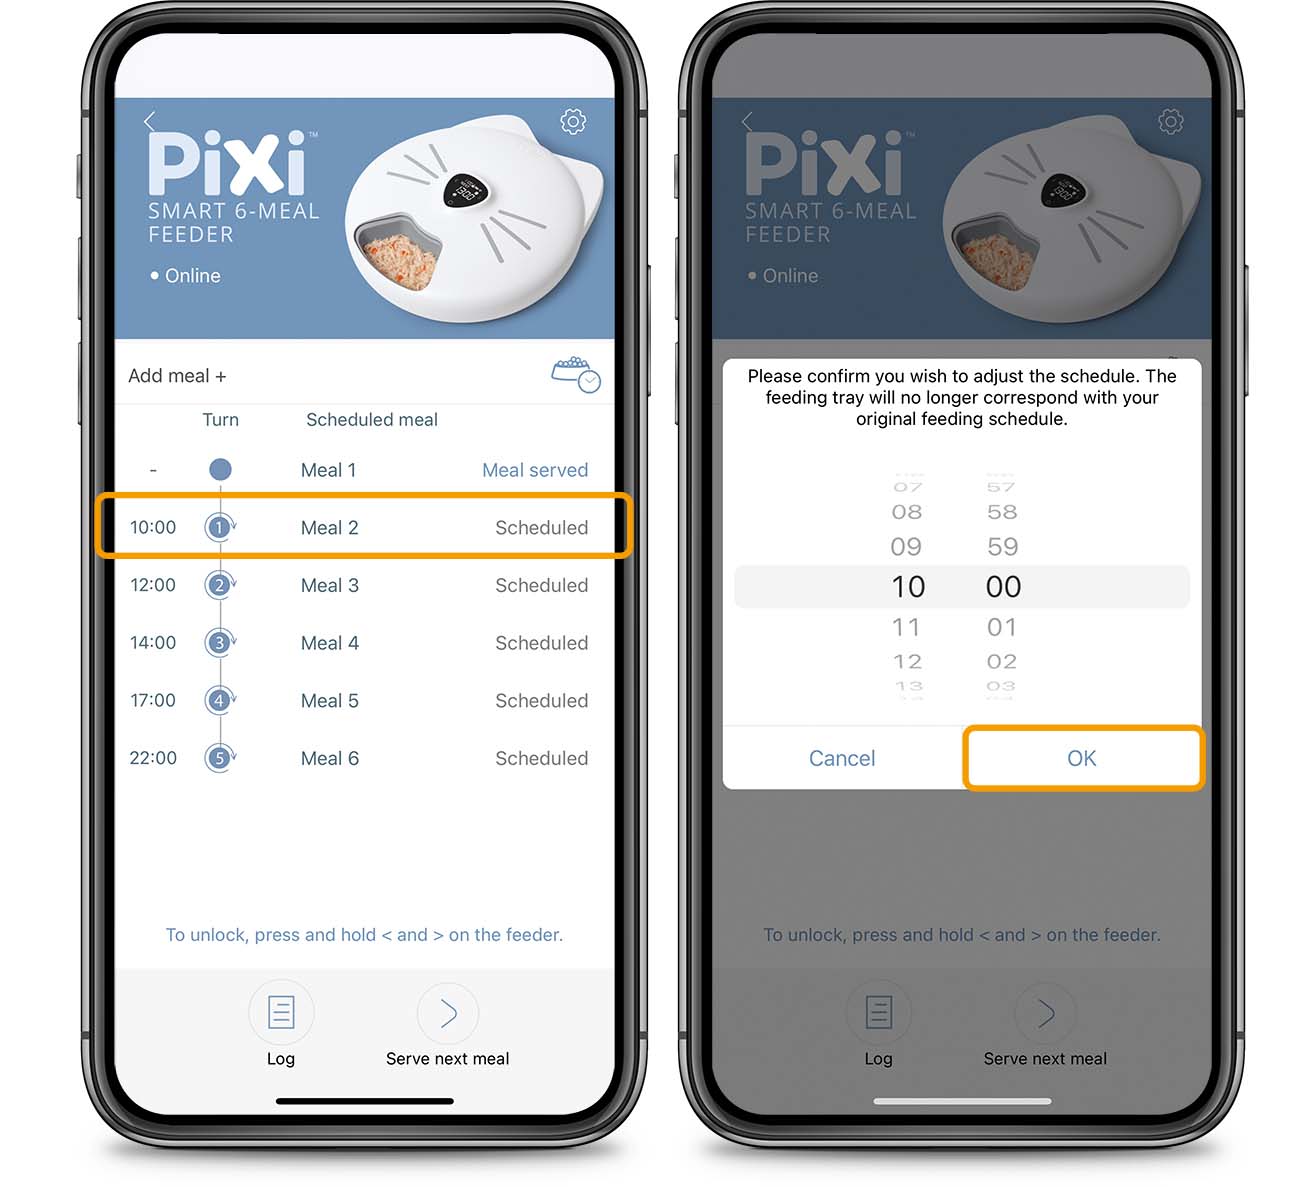
Tap on the meal you would like to adjust. Select the new time in the pop-up window and tap ‘ok’.
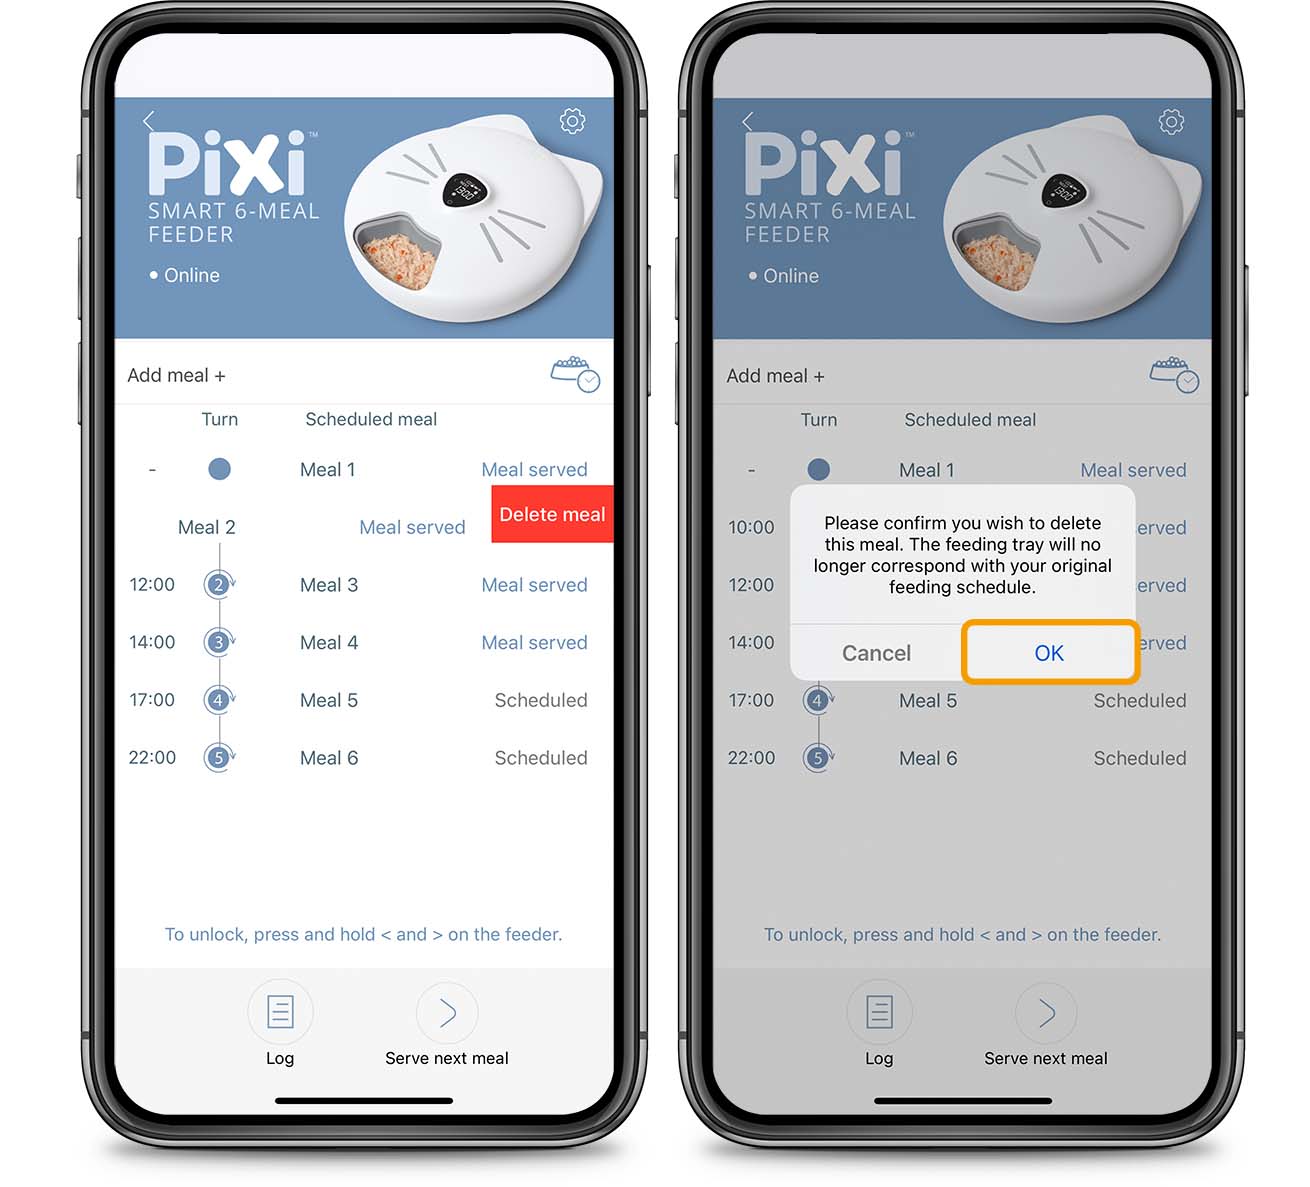
Delete a meal by swiping it to the left and tapping ‘delete’. A window will pop up asking to confirm your choice. To do so, press ‘ok’.
5. Manually serve next meal ahead of the scheduled time
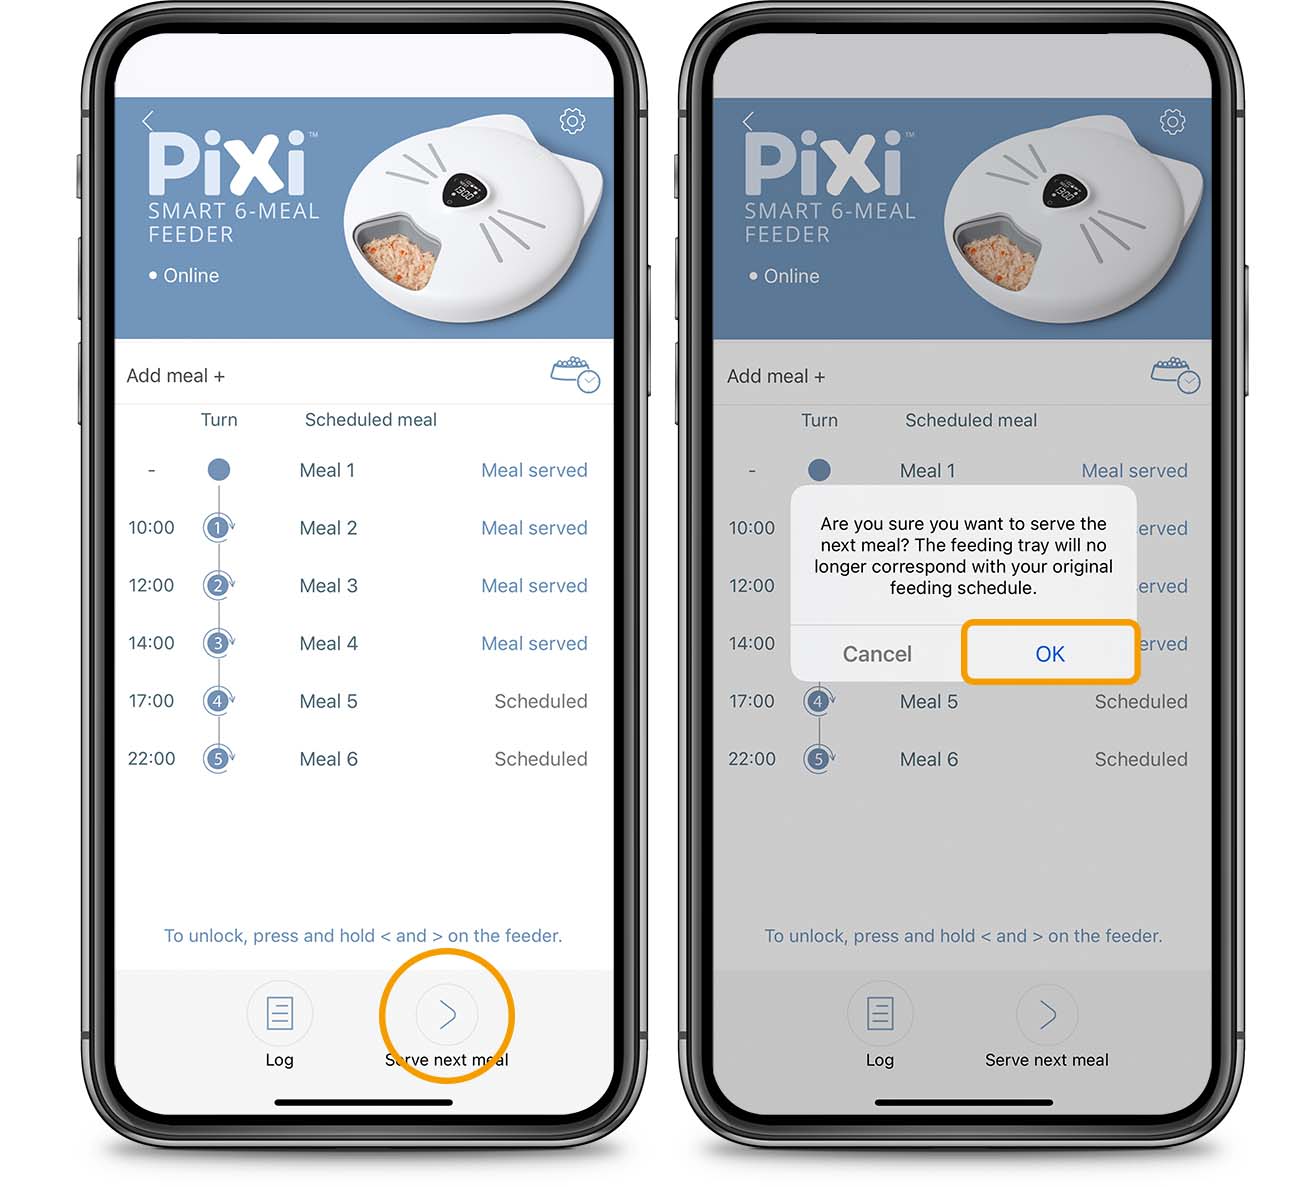
To serve the next meal manually, tap the ‘>’ button above ‘serve next meal‘. The pop-up window will indicate that making changes to your feeding schedule (in this case by skipping ahead), will cause the feeding tray to no longer correspond with your original feeding schedule. Confirm with ‘ok‘.
6. Audio
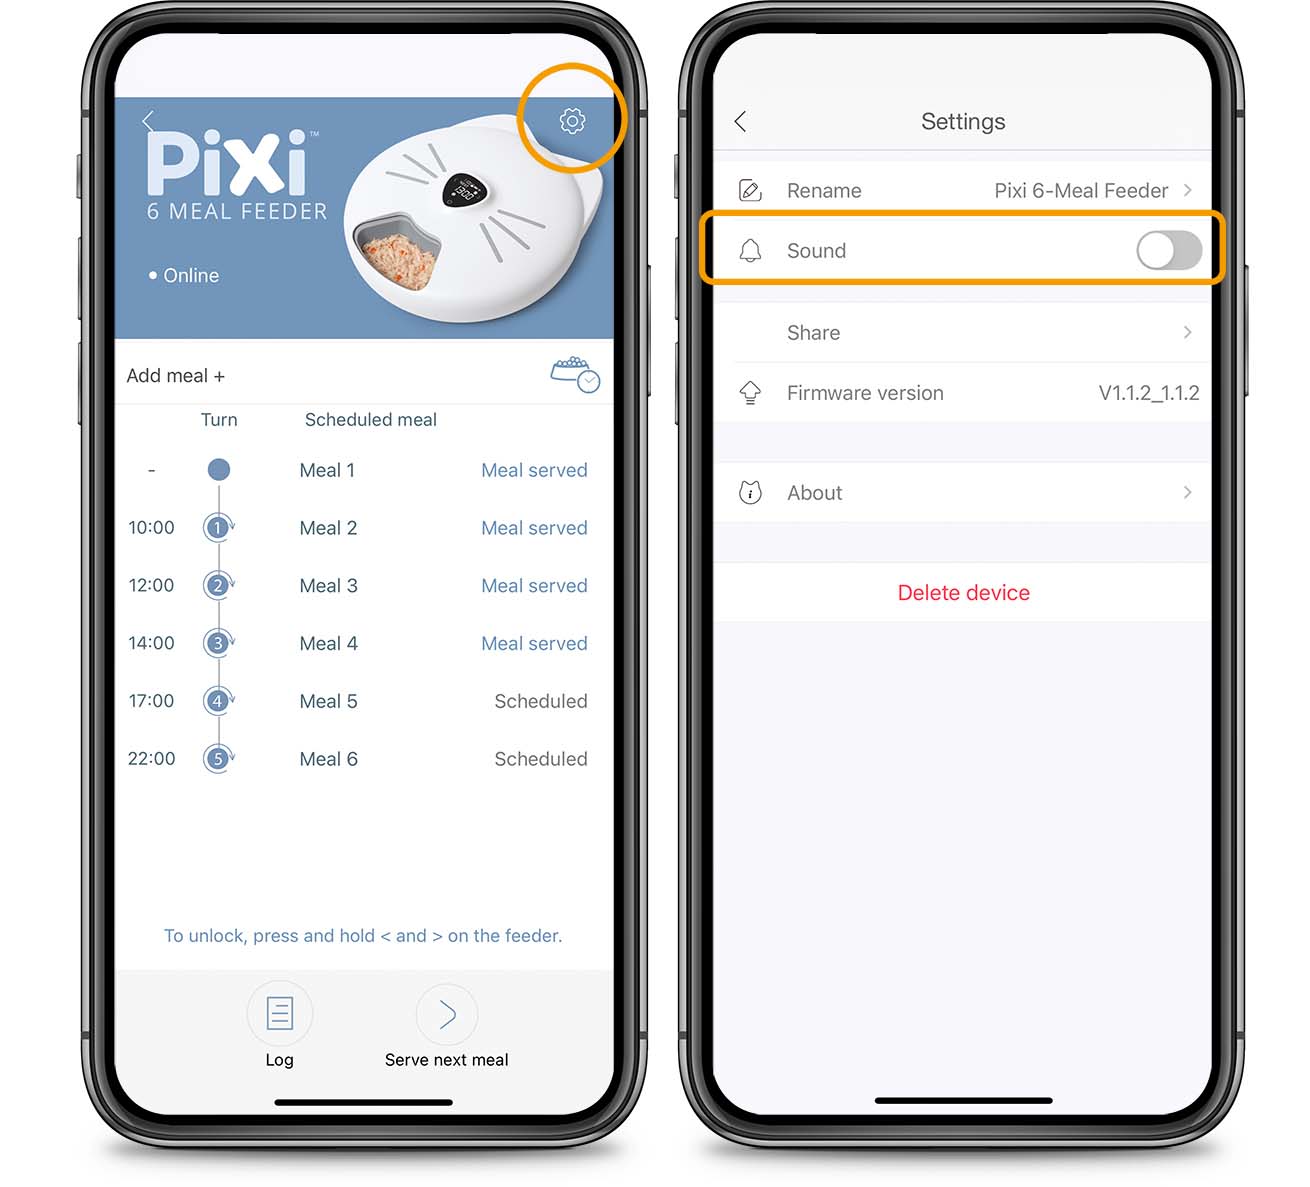
With audio turned on, the Catit PIXI Smart 6-meal Feeder will play a sound each time a meal is served, to notify your cat. The audio is enabled by default. To disable the audio, tap on the settings icon and make sure the toggle switch next to ‘sound‘ is turned off (grey).
Thank you for reading!
You’re now completely up to speed on the Catit PIXI Smart 6-meal Feeder app features.
Would you like to learn more about sharing your device with a friend or family member? Please check our Quick Start Guide.
We also have a detailed article on the various Catit PIXI App Notifications.
